*Disclaimer*
This guide is by no means authoritative on this subject. I was satisfied with how the feature was working in my own game and thought I would share the steps I took did to get it working. Hopefully somebody will find this useful, and maybe improve it.
With the release of Godot 3.3 and, plugins finally being available for iOS, I figured this would be a great time to try to get this feature working. The Godot developers have official iOS Plugins for GameCenter, iCloud and StoreKit and they have written official documentation for them.
Wait a minute, there isn’t any documentation for iCloud on that page, what gives? Your observation is correct, and that is what made this task a challenge to complete. Hopefully this guide will be useful as a stepping stone in helping other developers get this feature working in their games.
Apple offers 3 different types of online storage that you can use with your game. Key-Value Storage, Document Storage and Cloudkit. This guide is going to focus on Key-Value Storage to achieve Cloud Saves and Save Game Synchronization. Key-Value Storage does have some limitations to be aware of. Your game will only have 1 megabyte of Key-Value iCloud Storage per user and strings are limited to being 64 bytes.
If you have not already registered to be an Apple developer, you will need to head on over and register, and pay your $100 annual fee. Once you are a registered Apple developer, make an app identifier and select iCloud as one of the app’s capabilities. Click on the edit button to create an iCloud Container URL.

Once the App Configuration with Apple is finished we are ready to start working in Godot. Lets create a new project and start by installing the iCloud plugin from its Git Repository. After downloading and extracting the plugin, we need to add it to our project. Inside of our project directory make a “ios/plugins” folder, then drag the iCloud folder that you extracted into the plugins folder.

With the plugin installed we are ready to start writing some code. Make a new scene with the root node just being a standard node and attach a script to it. The very first variable that we are going to declare is an empty reference to store the iCloud Singleton.
var iCloud;This is now where we need to start planning what kind of data we need to store and synchronize with iCloud. The Key-Value Storage solution has methods that we can use to upload and download individual Key / Value pairs or groups of Key / Value pairs. If hearing that made you start thinking that this sounds almost exactly like a Godot Dictionary, that’s because you are correct.
Instead of managing individual variables we can make a dictionary with all of our data. Things that you typically would want to save would be player progress related. As an example I am going to make a dictionary with HP, XP and Coins. We are also going to need a key in the dictionary to help keep your data synchronized, so I am going to make a Timestamp key too.
var save_data = {
HP = 3,
XP = 100,
Coins = 10,
Timestamp = 0
}
Inside of the node’s ready event we are going to check if iCloud is available and assign the singleton to the blank reference that we created earlier. Because we are dealing with a singleton that may not always be available, I like to keep any function calls that are platform specific inside of an if statement that checks for the current platform.
func _ready():
     if (OS.get_name() == "iOS" && Engine.has_singleton("ICloud")):
          iCloud = Engine.get_singleton("ICloud");
With the iCloud singleton now assigned, we can write save and load functions to send and receive data to and from iCloud. Inside of our _save() function we will call set_key_values and pass it our dictionary to upload it, and after we will synchronize iCloud. _load() will be where we call get_all_key_values to to download data from iCloud and assign it to a temporary variable.
func _save(data):
     if (OS.get_name() == "iOS" && iCloud):
          iCloud.set_key_values(data);
          iCloud.synchronize_key_values();

func _load():
     if (OS.get_name() == "iOS" && iCloud):
          var temp_data = iCloud.get_all_key_values();
Now at this point we have data being uploaded to iCloud, and we are downloading data from iCloud. But we are not doing anything with that data yet, and we have no way of knowing if the data that we just downloaded from iCloud is correct. So at this point we are going to do a little bit of validation.
The timestamp key that we created in our local dictionary is going to be what we use to determine which save file is is the most to date. That key will need to store the timestamp from when it was uploaded. Then when we download the data we can check the time that it was uploaded and compare it with our local data to see which is more recent.
Godot has multiple methods of getting a date that you can compare, but I think that the easiest one is to get a Unix time stamp. Unix and Linux calculate time by counting the number of seconds since the Unix Epoch. This is great for us, that means that the function OS.get_unix_time() returns in integer value, and we can just compare which int is larger. We can also add a print line just so that we can see it worked when we run this on an iPhone.
func _save(data):
     if (data.has("Timestamp"):
          data.Timestamp = OS.get_unix_time();
     if (OS.get_name() == "iOS" && iCloud):
          iCloud.set_key_values(data);
          iCloud.synchronize_key_values();

func _load():
     if (OS.get_name() == "iOS" && iCloud):
          var temp_data = iCloud.get_all_key_values();
          if (temp_data.has("Timestamp"):
               if (temp_data.Timestamp >= save_data.Timestamp):
                    save_data = temp_data;
                    print(save_data);
Now that our save and load functions are finished and we validate which is the most recent save data we just need to call these functions. we can call _load() right after we get the iCloud singleton in the ready function. The easiest spot to put the save function would be in the exit tree function when the app is closed.
func _ready():
if (OS.get_name() == "iOS" && Engine.has_singleton("iCloud")):
iCloud = Engine.get_singleton("iCloud");
_load():
func _exit_tree():
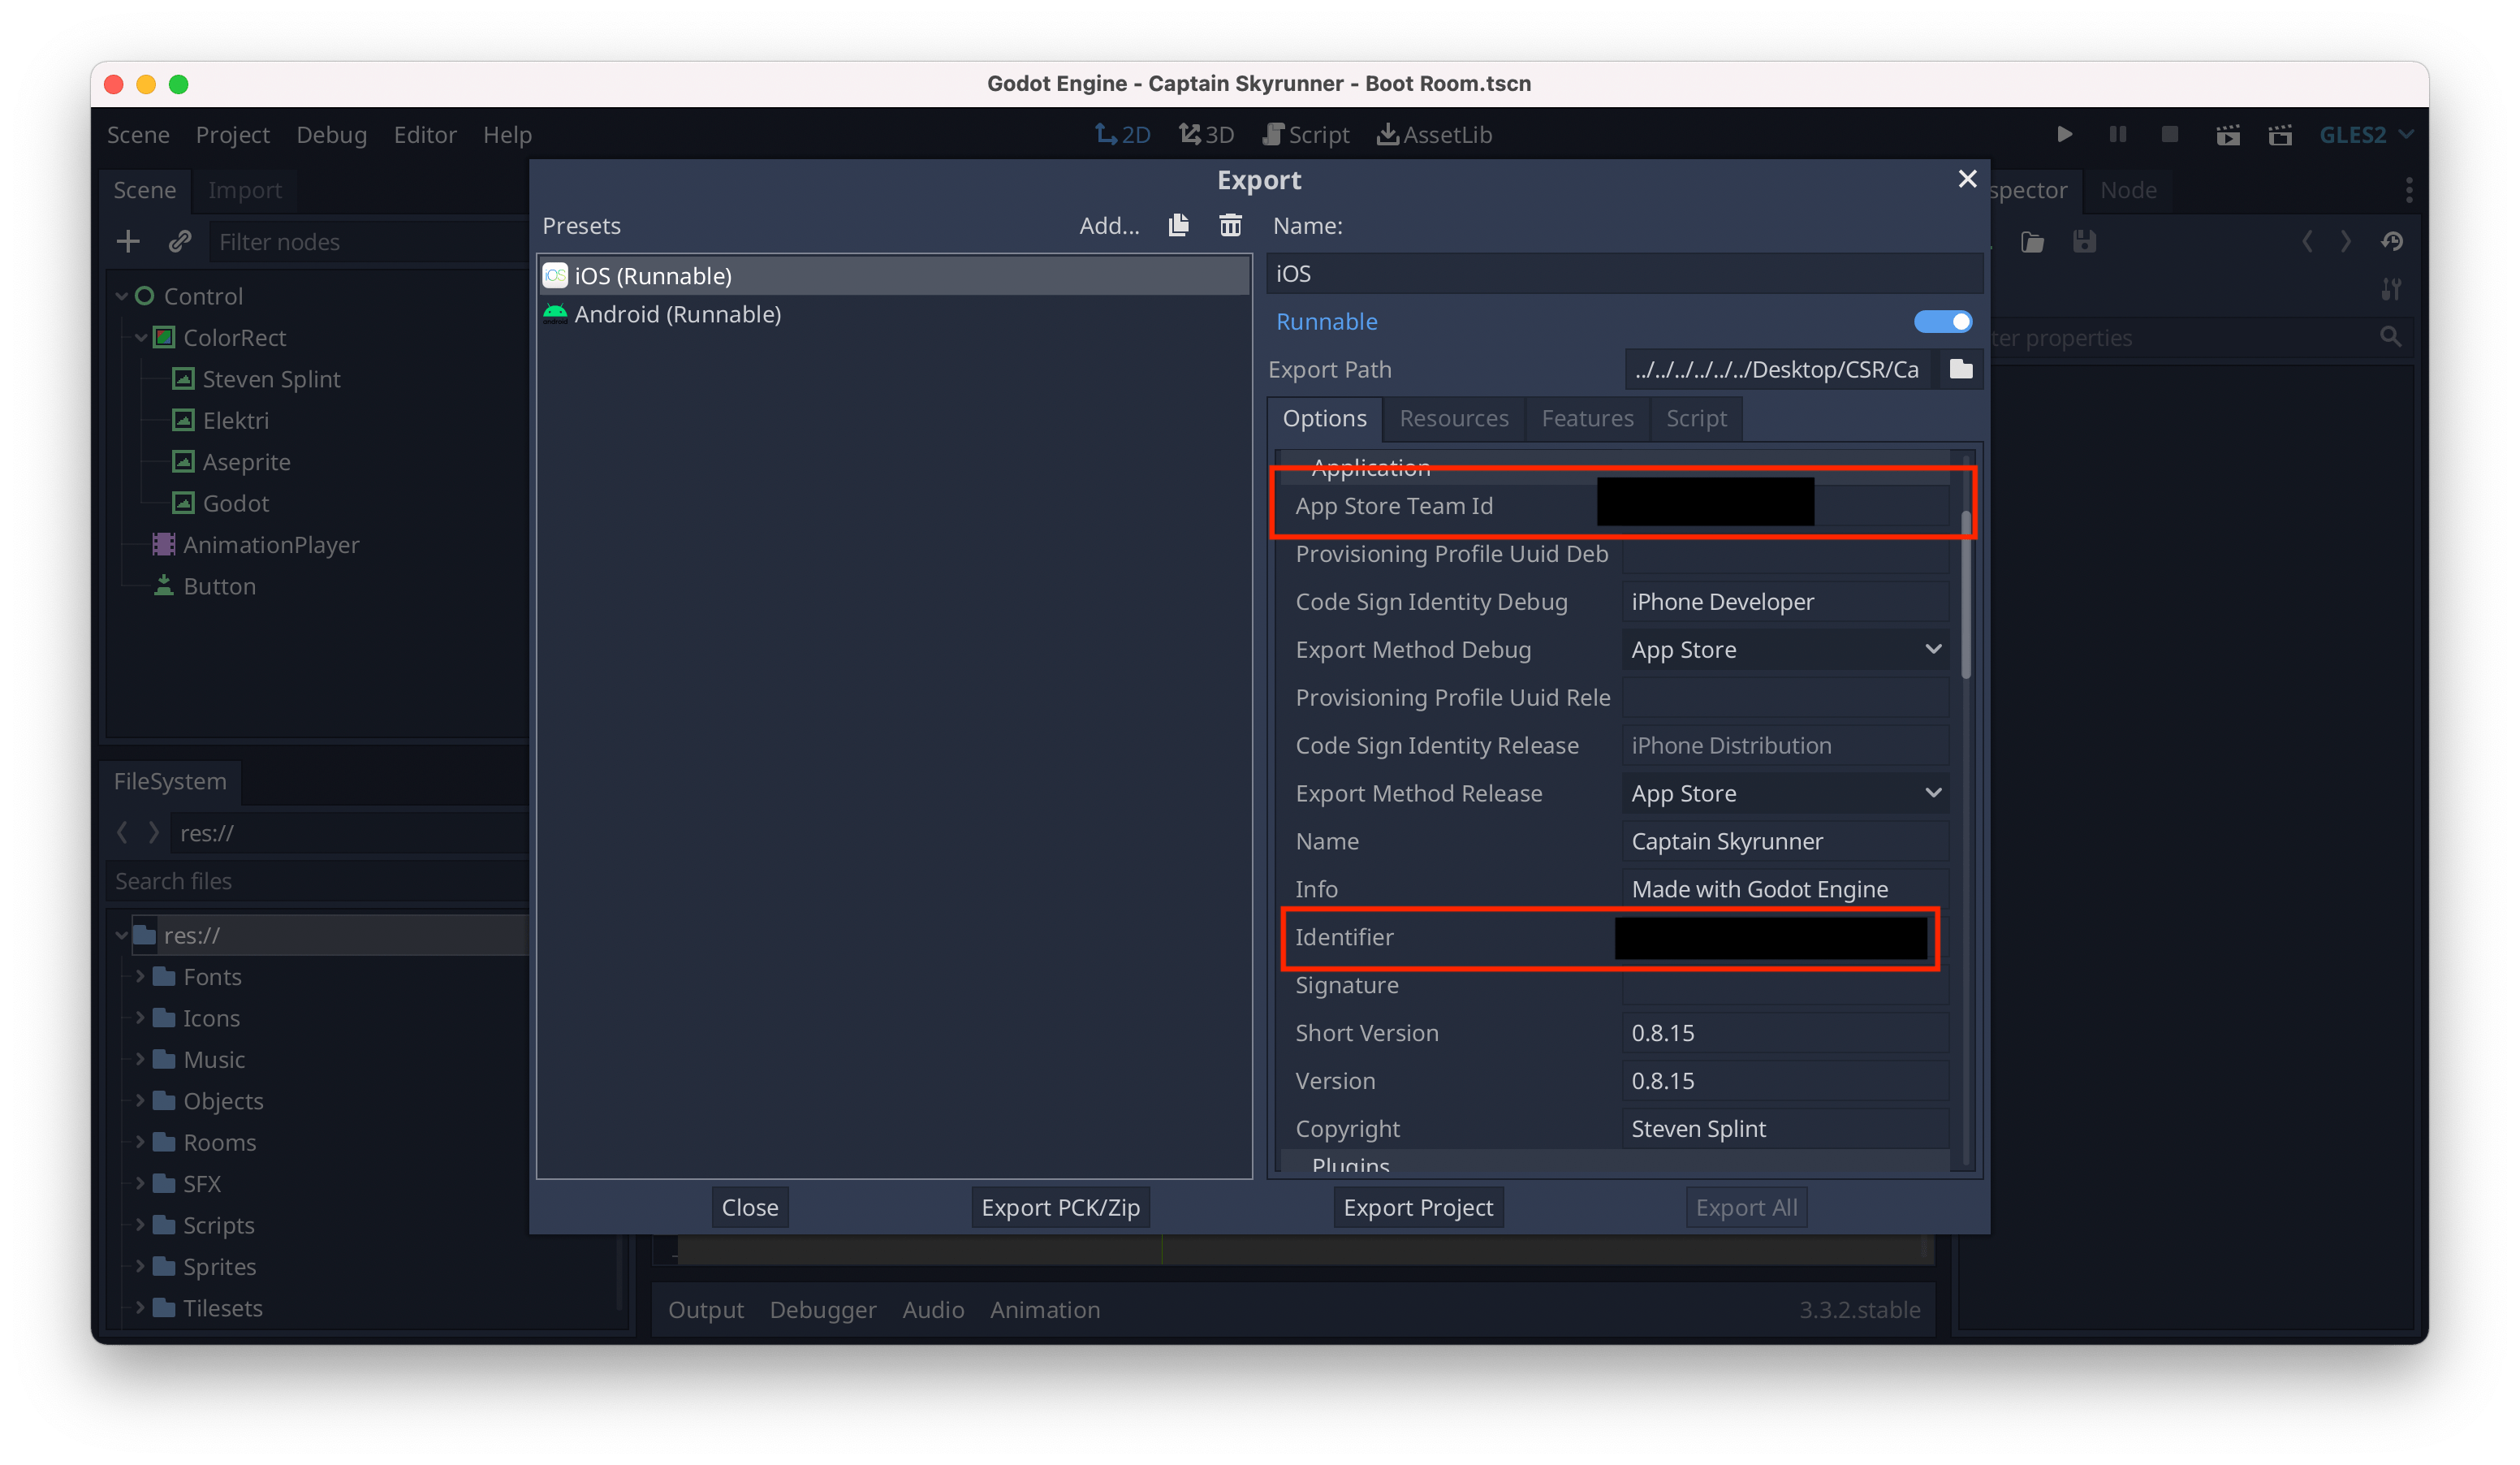
_save(save_data);That is all of the code that we need to make this project work. We are now ready to export the project and continue working in Xcode. To export click on Project -> Export -> iOS (Runnable). Make sure that you have installed the build template for iOS, clicked the checkbox to export with the iCloud plugin. Your App Store Team ID and App Bundle Identifier are also required for the feature to work.
The Godot iCloud Plugin doesn’t automatically add the capability in Xcode. We will need to add the capability after opening the project in Xcode. Adding a capability is done by clicking your project name in the view on the left hand side, then click “Signing & Capabilities” near the top. The button to add a capability is now immediately under the “Signing & Capabilities” link. After the capability has been added, you need to check the Key-Value Storage checkbox, and the Cloudkit checkbox which seems to be what activates the link to your container.

And that is pretty much it. This is all I have needed to do to get this working, plug in an iPhone or iPad press the play button at the top and keep an eye on the console output.
Keep in mind that the very first time your app is run by a new user get_all_key_values() returns an empty dictionary, and the if statements will validate as false the first time your game is executed (and could cause your game to crash if you don’t check if keys exist before you try to access them). Once you quit your game and data is uploaded to iCloud, subsequent boots should trigger the print command that we put in the example.

The new plugin system for iOS is real cool and pretty easy to use, the developers and contributors to Godot should be proud. Unfortunately there isn’t an official Godot Plugin to do save game sync with Android / Google Play, like there is with iOS. Thankfully there is this plugin that is available, and the documentation is pretty good too, so I don’t think that I need to write a guide for Android.
Until Next Time
– Steven
P.S.
I have done some more work on this and the feature works without needing CloudKit or your CloudKit URL checked when you compile.


